

How To Set Up Google Remarketing Tag
Google re-marketing allows you to target potential customers that yous know are already in-marketplace for the products or services. This is a stride-by-step guide to help you practise your Google re-marketing.

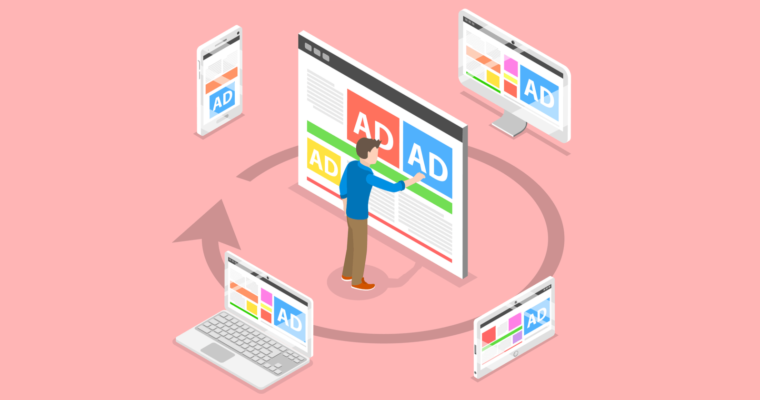
If you already annunciate on Google, all you demand to do is add together a slice of Google re-marketing lawmaking, also known as a tag or pixel, to your website and so that visitors tin get added to your re-marketing audiences through browser cookies. You can customise the code for different pages to represent to more defined categories.
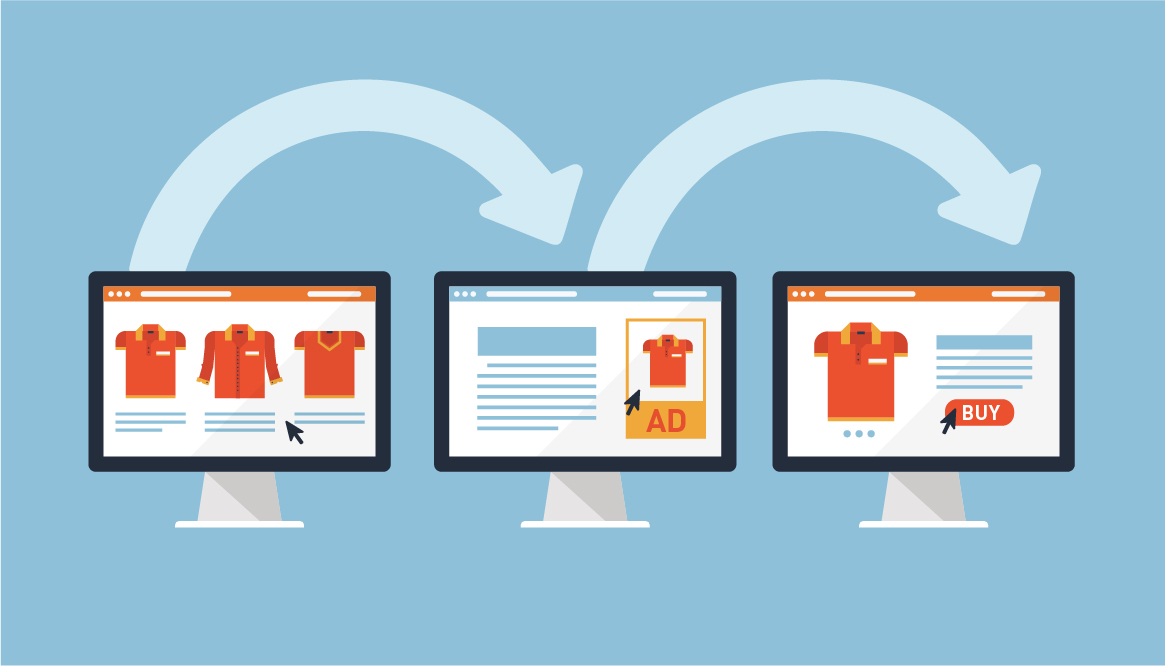
For example, let's say you operate an e-commerce business organisation that sells kitchen supplies. You might create a "toaster" re-marketing audience based on people who visit the pages of your site where yous sell toasters. That way, you tin show these specific visitors highly targeted display ads that marketplace your toasters. Y'all already know they are in-market for toasters, and now you can draw them dorsum, peradventure with a special offer similar "free shipping."
Using re-marketing, you can testify Google ads to your previous site visitors while they browse the vast number of Google partner sites in the Google Display Network.
Google recommends that when you are starting your first re-marketing campaign, y'all brainstorm by targeting everyone who viewed your homepage. Merely remember, that will increase your Google re-marketing costs since your ads are being re-targeted to more individuals, and you won't be able to create ads that are quite as targeted. By targeting more than narrowly, you can therefore increase advertizement relevancy and lower your cost per click.
Somewhen, you can create different Google re-marketing lists for super-targeted re-marketing campaigns; for example, you can choose to show users who have already purchased from your site dissimilar ads from non-buyers (such as an offer for 30% off your 2d buy).
As a "beginner" to Google remarketing you desire to go on it simple, you can later optimise and extend your re-marketing campaigns and strategy by taking more control and making it more than dynamic. (There are a couple of tips on Re-marketing Best Practices at the bottom of this page)
How to first your remarketing campaign:
i. Go to your AdWords account
two. Find the wrench icon in the top right corner of the folio and select information technology
3. Nether the shared library header, select "audition manager"
4. On the left menu select "Audience Sources"
5. On the AdWords Panel you lot should see a link that says "Fix Tag"
vi. From the Screen that pops up, select the first selection ("Collect standard information available from this information source") - applicable to most people (except if you are a retail business, then the "collect specific attributes or parameters to personalise ads" might be useful - dynamically optimises the ad to match products the customer viewed on your website or added to their cart) hit save and continue
7. Now you will be given your remarketing Tag and instructions on how to implement it on your website
8. If you're using Google Tag Manager you will exist given your conversion ID for that piece of code, when you're setting upwards your Google Tag Manager Code and Container and tag you'll demand to put that conversion ID in there
9. Once y'all're done and click continue you will be back on the audience sources page
10. From the left menu choose "Audition Lists"
11. From the previous phase AdWords has created an automated list based on all website visitors which you volition find nether "All Visitors (AdWords)" (If you desire to set up custom lists based on website URLs you lot tin can do that from this screen past selecting the large blueish button)
12. Go back to the main user interface and the campaigns section (On the left hand side)
thirteen. select the blueish push for "new campaign"
14. Select "brandish network"
xv. You will get options based on the goals of the campaign
sixteen. Select "Website Traffic"
17. Choose "Standard display entrada" equally the entrada subtype
18. Add together domain
19. Name your campaign
twenty. Choose the Locations and Language
21. Untick the "Enable Enhanced CPC" in order to have full control on bidding and costing and leave it every bit "Manual CPC"
22. Enter daily budget, leave the commitment method as standard
23. Go to Boosted Settings
24. Change the frequency capping to (for example) 4 impressions per solar day per advertisement group , then y'all do not over span people
25. Create your AdGroup Name (Audience List)-> All Website Visitors
26. Prompted to cull Audition, bound into Remarketing -> Website Visitors (where you will observe your car-generated list by AdWords)
27. Change the automated targeting setting to "No automatic targeting" so you take full control of what you lot'd similar to target
28. Fix an AdGroup Bid
29. Create Ad
30. Choose Responsive Ad
31. Add images
32. Add Logo
33. Create the text content
34. "Add to AdGroup"
35. "Create Campaign"
36. On your primary screen of the campaigns department, you tin can see your campaigns listed
BASICALLY: Create Audience List (who your campaign should reach), Set Upwardly Tag, Create Campaign
Set up conversion tracking for your website
Pace one: Create a conversion action
- Sign in to your Google Ads account.
- In the upper right corner, click the tool icon , and under "Measurement", click Conversions.
- Click the plus push .
- Click Website.
- Side by side to 'Conversion name', enter a name for the conversion that you'd similar to track, such equally 'newsletter sign-up' or 'hymeneals bouquet purchase'. This will help you to recognise this conversion action later in conversion reports.
- Next to 'Category', select a description for your conversion activity from the drop-down menu. The category allows you to segment your conversions in reports, so that you can come across similar conversions together.
- Next to 'Value', select how to runway the value of each conversion.
- Use the same value for each conversion. Enter the corporeality that each conversion is worth to your business organisation.
- Use unlike values for each conversion. Use this option if, for example, you're tracking purchases of products with different prices. Later, when you add your conversion tracking tag, you'll need to customise your tag to track transaction-specific values.
- Don't employ a value.
- Next to 'Count', select how to count these conversions.
- One. This setting is best for leads, such every bit a sign-up course on your website, when only one conversion per ad click probably adds value for your business.
- Every. This setting is best for sales, when every conversion probably adds value for your business concern.
- Click Conversion window. Select how long you lot want to track conversions later on an advertizing interaction from the drop-down menu. The window can be from one to 90 days. Learn more about conversion windows.
- Click View-through conversion window. Select how long to rail view-through conversions from the driblet-down. The window can be from 1 to 30 days.
- Click Include in 'Conversions'. This setting – selected by default – lets you make up one's mind whether or not to include information for this conversion action in your "Conversions" reporting column. If y'all untick this setting, data will still exist included in the 'All conversions' column. You lot might want to untick this setting if you use Smart Behest, and you don't desire to include this detail conversion activeness in your bid strategy. Observe out more almost the "Include in 'Conversions'" setting.
- Click Create and go on.
You'll now see a screen that shows that you've created your conversion action. Follow the instructions in the adjacent department to set up your tag.

Step 2: Prepare up your conversion tracking tag
To gear up website conversion tracking for the starting time fourth dimension, you'll need to add 2 lawmaking snippets to your website: the global site tag and the issue snippet.
The global site tag adds website visitors to your 'All visitors' remarketing lists (if you've set up up remarketing) and sets new cookies on your domain, which will store information most the advertizement click that brought someone to your site. Annotation that your Google Ads conversion tracking tag will be able to employ this click information to attribute a conversion to your Google Ads campaigns. Please ensure that you're providing users with clear and comprehensive information nigh data drove, and obtaining consent where legally required.
You lot must install the global site tag on every page of your website, but you need only one global site tag for each Google Ads account.
The issue snippet tracks actions that should be counted every bit conversions. Install this snippet on site pages you'd like to track conversions for. Each conversion action has its ain associated event snippet, whereas the global site tag is the same across all conversion deportment inside a Google Ads account.
Choose from 2 ways to install your tag
Option 1: Install the tag yourself
one.Under 'Global site tag', select the pick that best describes your situation and follow the instructions for installing the tag:
- I haven't installed the global site tag on my website: Cull this option if it's your first time setting up the tag for a conversion action in your account and you haven't installed the global site tag from another Google product. This option shows the full global site tag. To install the tag, copy the tag code and paste it between the <caput></head> tags of every folio of your website.
Hither'south an example of a global site tag, where "AW-CONVERSION_ID" stands for the conversion ID that'due south unique to your Google Ads account:
<script async
src='https://www.googletagmanager.com/gtag/js?id=AW-CONVERSION_ID'></script>
<script>
window.dataLayer = window.dataLayer || [];
function gtag(){dataLayer.push(arguments);}
gtag('js', new Appointment());
gtag('config', 'AW-CONVERSION_ID');
</script>
- I installed the global site tag on my website from some other Google product (example: Google Analytics) or from another Google Ads business relationship: If this option applies to y'all, you won't need to add the global site tag to your website once again; however, for conversion tracking to piece of work for this account, you'll need to add the config command (the piece of code that contains your conversion ID) to every instance of the global site tag. This pick shows that control, where 'AW-CONVERSION_ID' stands for your account's conversion ID:
gtag('config', 'AW-CONVERSION_ID');
Add the config command to every example of the global site tag on your website, right in a higher place the </script> finish tag.
Hither's an case of a global site tag that's configured for both Google Analytics and Google Ads, with the config command for the Google Ads account highlighted:
<script async
src='https://www.googletagmanager.com/gtag/js?id=GA_TRACKING_ID'>
</script>
<script>
window.dataLayer = window.dataLayer || [ ] ;
function gtag(){dataLayer.push button(arguments);}
gtag( 'js', new Date () ) ;
gtag( 'config', 'GA_TRACKING_ID');
gtag( 'config', 'AW-CONVERSION_ID');
</script>
- I already installed the global site tag on my website when I created another conversion activeness in this Google Ads business relationship: If this choice applies to you, you don't need to add the global site tag again to your website. Just make sure that the global site tag appears on every page of your site and confirm that the config control in each instance of the tag contains your account's conversion ID. Yous'll see your conversion ID when yous select this pick.
2.(Optional) Change the global site tag based on your preferences:
- If y'all don't want the global site tag to fix first-political party cookies on your site's domain, add the highlighted portion below to your global site tag'southward 'config' command:gtag('config',' AW-CONVERSION_ID',{'conversion_linker': false});
- If you don't desire the global site tag to add website visitors to your remarketing lists on initial folio load, add the highlighted portion below to your global site tag's 'config' control:gtag('config',' AW-CONVERSION_ID',{'send_page_view': false});
Note
We don't recommend doing this equally it will lead to less accurate conversion measurement.
- If you want to disable the collection of remarketing data, add the highlighted gtag('prepare') command to your global site tag above the gtag('js') command. This will disable the drove of remarketing information for all configured Google Ads accounts.
<script async
src='https://www.googletagmanager.com/gtag/js?id=AW-CONVERSION_ID'></script>
<script>
window.dataLayer = window.dataLayer || [];
role gtag(){dataLayer.push(arguments);}
gtag('set', 'allow_ad_personalization_signals', false);
gtag('js', new Engagement());
gtag('config', 'AW-CONVERSION_ID');
</script>
iii.Copy the global site tag, then follow the instructions to add information technology to your website.
4.Next to 'Effect snippet', select whether to rails conversions on a page load or click.
- Page load: Count conversions when customers visit the conversion page, such equally a confirmation page for a purchase or sign-up. This is the default and most common option. Learn more about Google'due south security standards.
- Click: Count conversions when customers click a button or link (such equally a 'Buy Now' button).
5.Re-create the event snippet, and then follow the instructions to add together it to your website, or click Download snippet to add it afterwards.
- If you lot're tracking conversions by folio load, add the result snippet to the folio that you're tracking.
- If y'all're tracking conversions by click, add together the event snippet to the page that has the push button or link that yous'd like to track for clicks.
half-dozen.Click Adjacent
vii.Click Done
eight.If you're tracking clicks on your website as conversions, follow these instructions to add an additional slice of code to the button or link that yous'd like to track. This step is required for conversion tracking to piece of work.
Option 2: Use Google Tag Manager
Google Tag Managing director is a tag management organisation that allows you to quickly and easily update tags and lawmaking snippets on your website. You lot tin use Google Tag Managing director to install your conversion tracking tag.
- Re-create the Conversion ID and Conversion label (shown in this tab) for your conversion activity.
- Follow the instructions to gear up up Google Ads conversion tracking in Google Tag Manager. Of import: To ensure proper tracking in all browsers, make sure you add together a Conversion Linker tag and configure it to fire on all of your spider web pages.
- Click Next.
- Click Washed.
- If y'all're tracking clicks on your website as conversions, you'll need to complete additional setup steps in Google Tag Manager. This is required for conversion tracking to work. Choose one of the ii options below:
- Bones: Set a click trigger so that the conversion tracking tag fires when the relevant click occurs.
- Advanced: Add a part call to the code for the link, button or push prototype. Then, set upwards a custom event trigger then that the conversion tracking tag fires when the event (in this instance, a click) occurs.
Tip: Install the conversion tracking tag with Google Tag Director
Instead of manually adding the conversion tracking tag to your website lawmaking, you tin use Google Tag Director to install the tag. You'll need to provide the following information:
- Conversion ID
- Conversion characterization
You'll discover this information in the event snippet for your conversion action. In the sample snippet below, AW-CONVERSION_ID stands for the conversion ID unique to your business relationship, while AW-CONVERSION_LABELstands for the conversion label, which is unique per conversion activity.
<!-- Outcome snippet for Example conversion folio --> <script> gtag('upshot', 'conversion', {'send_to': 'AW-CONVERSION_ID/AW-CONVERSION_LABEL', 'value': 1.0, 'currency': 'USD' }); </script>
Informing your site visitors about data collection
As always, delight ensure that you're providing users with articulate and comprehensive information about the data you collect on your websites, and getting consent for that drove where legally required.
Security and privacy for website tracking
Google's security standards are strict. Only pages containing the Google conversion tag are tracked through this programme. We employ data encryption and secure servers.
Please ensure that you're providing users with articulate and comprehensive data virtually the information yous collect on your websites, and getting consent for that collection where legally required.
Need help? Contact us through:
Telephone: +442088344795
E-mail: assistance@whitehat-seo.co.united kingdom

How To Set Up Google Remarketing Tag,
Source: https://www.whitehat-seo.co.uk/knowledge/how-to-set-up-google-remarketing
Posted by: depewmorte1952.blogspot.com
0 Response to "How To Set Up Google Remarketing Tag"
Post a Comment